
Introduction:
Crispy Chicken Katsu is a beloved Japanese dish. It features chicken cutlets that are breaded and deep-fried to golden perfection. The result is incredibly crunchy on the outside and juicy on the inside.
This dish is a staple in Japanese cuisine. It is enjoyed in homes and restaurants alike. Chicken Katsu is known for its satisfying texture and savory flavor.
Often served with steamed rice and a flavorful sauce, it’s a complete and comforting meal. It’s also incredibly versatile and can be adapted to various tastes. Prepare to experience a delightful culinary journey with this recipe.
Why You’ll Love This Recipe:
This Crispy Chicken Katsu recipe is designed for home cooks of all levels. It’s surprisingly simple to make, despite its restaurant-quality results. You’ll be amazed at how easily you can create this crispy delight in your own kitchen.
The texture is the key to what makes this recipe so irresistible. The panko breadcrumbs create an unparalleled level of crunchiness. This contrasts beautifully with the tender and moist chicken inside.
Beyond the texture, the flavor is simply fantastic. Seasoned chicken, perfectly fried, offers a savory and satisfying taste. It’s a dish that’s both comforting and exciting to eat. You’ll find yourself making this recipe again and again.
INGREDIENTS YOU’LL NEED:
To create perfect Crispy Chicken Katsu, you will need a selection of key ingredients. Each component plays a vital role in achieving the desired texture and flavor. Let’s explore each ingredient in detail.
The star of the dish is, of course, chicken breast. Opt for boneless, skinless chicken breasts for the best results. Chicken breasts provide a lean and tender base for the crispy coating.
For the breading, you will need all-purpose flour, eggs, and panko breadcrumbs. Flour helps the egg wash adhere to the chicken. Eggs act as a binder, allowing the panko to stick. Panko breadcrumbs are essential for the signature crispy texture of Katsu.
Seasoning is crucial to elevate the flavor of the chicken. You will need salt, black pepper, and garlic powder. These simple seasonings enhance the natural taste of the chicken and complement the crispy coating. Feel free to adjust these to your taste.
Finally, you’ll need oil for frying. Choose a neutral oil with a high smoke point, such as vegetable oil or canola oil. Ensure you have enough oil for deep-frying to achieve even cooking and perfect crispiness. The right oil is important for the final result.
HOW TO MAKE “Crispy Chicken Katsu”:
Making Crispy Chicken Katsu at home is a rewarding culinary experience. The process is divided into several manageable steps. These steps ensure that each element of the dish is perfectly executed.
First, you’ll need to prepare the chicken breasts. This involves pounding them to an even thickness for uniform cooking. Seasoning the chicken at this stage is crucial for flavor development.
Next, you will set up a breading station. This typically involves three shallow dishes: one for flour, one for beaten eggs, and one for panko breadcrumbs. This organized setup makes the breading process efficient.
The breading process itself is a key step. Each chicken cutlet is dredged in flour, then dipped in egg, and finally coated in panko. Proper technique ensures a fully coated and extra crispy result.
Frying is the final and crucial step. The chicken is deep-fried in hot oil until golden brown and cooked through. Maintaining the correct oil temperature is essential for achieving perfect crispiness without burning.
After frying, the katsu needs to be drained of excess oil. This is best done on a wire rack to maintain its crispy texture. Serving the katsu promptly while it’s still warm and crispy is highly recommended.
STEP-BY-STEP INSTRUCTIONS:
Let’s walk through a detailed, step-by-step guide to prepare Crispy Chicken Katsu. Following these instructions closely will lead you to culinary success. Each step is designed for clarity and ease.
Step 1: Prepare the Chicken Breasts.
Begin by placing your chicken breasts on a cutting board. Cover them with plastic wrap. Using a meat mallet or rolling pin, gently pound the chicken to an even thickness of about 1/4 inch. Pounding ensures even cooking and tenderizes the chicken.
Step 2: Season the Chicken.
Once pounded, season both sides of the chicken breasts generously. Use salt, freshly ground black pepper, and garlic powder. Ensure the seasoning is evenly distributed for maximum flavor penetration. This step enhances the overall taste of the katsu.
Step 3: Set Up the Breading Station.
Prepare three shallow dishes for the breading process. In the first dish, place all-purpose flour. In the second dish, whisk two large eggs until well combined. In the third dish, place the panko breadcrumbs. Arrange these dishes in a line for an efficient breading workflow.
Step 4: Bread the Chicken Cutlets.
Take one seasoned chicken cutlet. Dredge it thoroughly in the flour, ensuring all surfaces are coated. Shake off any excess flour. Next, dip the floured chicken into the whisked eggs, coating it completely. Finally, press the egg-coated chicken into the panko breadcrumbs. Press firmly to ensure the panko adheres well and creates a thick, crispy crust. Repeat this breading process for each chicken cutlet.
Step 5: Heat the Oil for Frying.
Pour vegetable or canola oil into a deep skillet or pot. You’ll need enough oil to submerge the chicken, about 2-3 inches deep. Heat the oil over medium-high heat until it reaches 350°F (175°C). Use a kitchen thermometer to ensure accurate temperature. If you don’t have a thermometer, test the oil by dropping a few panko breadcrumbs in; they should sizzle and turn golden brown in about 15-20 seconds.
Step 6: Fry the Chicken Katsu.
Carefully place the breaded chicken cutlets into the hot oil, being careful not to overcrowd the pan. Fry in batches if necessary to maintain oil temperature. Fry each cutlet for about 3-4 minutes per side, or until golden brown and cooked through. The internal temperature of the chicken should reach 165°F (74°C).
Step 7: Drain Excess Oil.
Once the chicken katsu is golden brown and cooked through, remove it from the oil using tongs or a slotted spoon. Place the fried katsu on a wire rack set over a baking sheet. This allows excess oil to drip off, keeping the katsu crispy. Do not place directly on paper towels as they can make the bottom soggy.
Step 8: Slice and Serve.
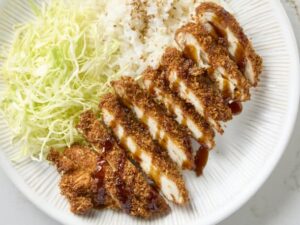
Let the Crispy Chicken Katsu cool slightly for a minute or two. Then, slice each cutlet into strips about 1-inch wide. Arrange the sliced katsu on a serving plate. Serve immediately while it’s still hot and crispy. Enjoy with steamed rice and your favorite dipping sauce.
USEFUL TIPS:
To achieve truly exceptional Crispy Chicken Katsu, consider these helpful tips. These suggestions cover key aspects from preparation to frying, ensuring your katsu is perfectly crunchy and delicious every time.
For maximum crispiness, use panko breadcrumbs. Panko is coarser than regular breadcrumbs, creating a lighter and crispier coating. Its irregular texture provides more surface area for crunch. Avoid using fine breadcrumbs as they may result in a less crispy crust.
Ensure the oil temperature is consistent throughout the frying process. Maintaining 350°F (175°C) is crucial for even cooking and crispiness. If the oil is too cold, the katsu will be greasy. If it’s too hot, the outside will burn before the chicken is cooked through. Use a kitchen thermometer for accuracy.
Do not overcrowd the pan when frying. Frying too many cutlets at once will lower the oil temperature. This leads to uneven cooking and greasy katsu. Fry in batches to maintain optimal oil temperature and ensure each piece cooks perfectly.
Pound the chicken breasts to an even thickness. This ensures that the chicken cooks uniformly and prevents some parts from being overcooked and dry while others are undercooked. Even thickness promotes consistent texture and doneness.
Season the chicken generously at every stage. Seasoning the chicken before breading, as well as seasoning the flour and panko lightly, enhances the overall flavor profile. Don’t be afraid to be liberal with your salt and pepper.
Let the fried katsu drain on a wire rack. This allows air to circulate around the katsu, preventing the bottom from becoming soggy. Paper towels can trap steam and make the underside lose its crispiness. A wire rack is ideal for maintaining texture.
Serve Crispy Chicken Katsu immediately after frying. Katsu is best enjoyed when it’s freshly made and at its crispiest. While it can be reheated, it’s never quite as perfect as when it’s straight from the fryer. Plan to serve shortly after cooking for the best experience.
DETAILS:
Let’s explore the specific details of this Crispy Chicken Katsu recipe. Understanding these details will help you in planning your cooking and appreciate the nuances of this dish.
Prep Time: Approximately 25 minutes. This includes pounding the chicken, seasoning, setting up the breading station, and breading the cutlets. Efficient preparation makes the cooking process smoother and quicker.
Cooking Time: Approximately 20 minutes. Frying each batch of chicken katsu takes about 6-8 minutes, depending on thickness and oil temperature. The total cooking time may vary based on batch size and pan capacity.
Total Time: Approximately 45 minutes. This is the sum of prep time and cooking time, offering a clear idea of the total time commitment from start to finish. It’s a relatively quick meal for such a flavorful dish.
Yield: 4 servings. This recipe yields approximately 4 servings, making it ideal for a family meal or small gathering. Serving sizes can be adjusted according to appetite and accompanying sides.
Category: Main Course, Lunch, Dinner. Crispy Chicken Katsu is versatile and suitable for various meal occasions. Its satisfying nature makes it perfect for lunch or dinner, and it can even be a delightful main course for a special meal.
Method: Frying. The primary cooking method for this recipe is deep-frying. Deep-frying achieves the signature crispy texture and golden-brown color of Chicken Katsu. It’s essential for the dish’s characteristic crunch.
Cuisine: Japanese. Chicken Katsu is a classic1 example of Japanese comfort food. This recipe stays true to traditional Japanese culinary techniques, focusing on simple yet impactful flavors and textures.
Diet: Not specified. While this recipe is not inherently diet-specific, it can be modified to suit certain dietary needs. For a lighter version, baking instead of frying can be considered, though the texture will differ.
NOTES:
Consider these additional notes to personalize and enhance your Crispy Chicken Katsu experience. These insights provide flexibility and address potential variations and considerations for different preferences.
For enhanced flavor, marinate the chicken breasts before breading. A simple marinade of soy sauce, ginger, and garlic for 30 minutes can deepen the savory taste. Marinating adds an extra layer of complexity and tenderness to the chicken.
Experiment with different seasonings in the breading. Adding spices like paprika, onion powder, or cayenne pepper to the flour or panko can create unique flavor profiles. Customize the seasoning to match your preferred taste.
If you desire a gluten-free version, use gluten-free panko breadcrumbs and gluten-free flour. Ensure all ingredients are certified gluten-free to cater to dietary restrictions. Gluten-free alternatives can provide a similar crispy texture.
For a richer flavor, try using chicken thighs instead of breasts. Chicken thighs are fattier and more flavorful, though they may require slightly longer cooking time. Adjust frying time to ensure thighs are cooked through.
Consider serving Crispy Chicken Katsu with traditional Japanese Tonkatsu sauce. Tonkatsu sauce is a savory and slightly sweet sauce that perfectly complements the richness of the katsu. Japanese mayonnaise or a simple lemon wedge are also excellent accompaniments.
To keep the katsu warm and crispy if serving a larger group, place the fried katsu in a slightly warmed oven (around 200°F or 90°C) on a wire rack. This helps maintain warmth and crispiness without making it soggy.
For a healthier twist, although not strictly traditional, you can try baking the katsu. While it won’t be as crispy as fried, baking can reduce the oil content. Bake at 400°F (200°C) until cooked through, flipping halfway. The texture will be different but still enjoyable.
FREQUENTLY ASKED QUESTIONS:
Let’s address some common questions regarding the preparation of Crispy Chicken Katsu. These answers are designed to offer practical solutions and clarity to ensure a successful cooking experience.
Q: Can I bake the Chicken Katsu instead of frying?
A: Yes, you can bake it, but the texture will be different. Baked katsu won’t be as crispy as fried. To bake, preheat your oven to 400°F (200°C), place breaded cutlets on a baking sheet, and bake for 20-25 minutes, flipping halfway, until cooked through. For better crispiness when baking, you can lightly spray the panko-coated chicken with oil before baking.
Q: Can I use chicken thighs instead of chicken breasts?
A: Yes, chicken thighs work well and offer a richer flavor. Boneless, skinless chicken thighs are recommended. Pound them to an even thickness and follow the same breading and frying instructions. Thighs may require a minute or two longer to cook through than breasts.
Q: How do I keep Chicken Katsu crispy after frying?
A: The best way to keep katsu crispy is to drain it on a wire rack, not paper towels, and serve it immediately. If you need to keep it warm, place it on a wire rack in a slightly warmed oven (200°F or 90°C) for a short time. Avoid covering it tightly as steam will soften the crust.
Q: Can I make Chicken Katsu ahead of time?
A: Chicken Katsu is best enjoyed fresh and crispy. While you can fry it ahead of time, it will lose some crispiness as it cools. For best results, fry just before serving. If you must prepare ahead, reheat in the oven to try and restore some crispness, but it won’t be exactly the same as freshly fried.
Q: What type of oil is best for frying Chicken Katsu?
A: Use a neutral oil with a high smoke point, such as vegetable oil, canola oil, or peanut oil. These oils can withstand high temperatures needed for deep-frying without smoking or imparting unwanted flavors. Avoid oils with low smoke points like olive oil, which are not suitable for deep-frying.
STORAGE INSTRUCTIONS:
Proper storage is crucial for maintaining the quality of leftover Crispy Chicken Katsu. Follow these guidelines to ensure it remains enjoyable even when reheated.
Refrigeration: Allow the cooked Chicken Katsu to cool completely to room temperature after frying. Once cooled, place the katsu in an airtight container. Store it in the refrigerator. Properly refrigerated katsu will last for up to 3 days.
Reheating: To reheat leftover Chicken Katsu, preheat your oven to 350°F (175°C). Place the katsu on a baking sheet in a single layer. Reheat for 10-15 minutes, or until heated through and crispy again. Reheating in the oven is the best method to restore some of the original crispiness. Microwaving is not recommended as it will make the katsu soggy.
Freezing (Not Recommended): Freezing Crispy Chicken Katsu is generally not recommended. Freezing and thawing will significantly compromise the crispy texture of the panko coating. The katsu will likely become soggy and lose its desirable crunch. For best quality, enjoy Chicken Katsu fresh.
RELATED RECIPES
If you loved the satisfying crunch and savory flavor of Crispy Chicken Katsu, you’ll likely enjoy these other related recipes. These dishes offer similar textures, flavors, or culinary styles, perfect for expanding your cooking repertoire.
Chicken Karaage: Another popular Japanese fried chicken dish, Chicken Karaage is marinated and then deep-fried. Unlike Katsu, Karaage is typically seasoned with soy sauce, ginger, and garlic and doesn’t use breadcrumbs, resulting in a different but equally delicious crispy chicken experience.
Tonkatsu (Pork Katsu): Tonkatsu is the pork version of Chicken Katsu, using pork cutlets instead of chicken. The preparation method is nearly identical, resulting in a similarly crispy and savory dish. Tonkatsu is often served with Tonkatsu sauce and shredded cabbage.
Japanese Chicken Curry (Chicken Katsu Curry): Combine your Crispy Chicken Katsu with Japanese curry for a hearty and comforting meal. Serve sliced katsu over a bed of rice and ladle Japanese curry sauce over it. This is a popular and flavorful way to enjoy Katsu.
Crispy Fried Fish Katsu: Extend the Katsu technique to fish. Use firm white fish fillets, bread them in panko, and fry until golden and crispy. Fish Katsu is a lighter alternative to chicken or pork but still delivers the satisfying crunch.
Vegetable Katsu: For a vegetarian option, try making Katsu with vegetables like eggplant, sweet potato, or pumpkin. Slice the vegetables, bread them in panko, and fry until crispy. Vegetable Katsu is a delicious and creative way to enjoy the Katsu technique in a meat-free meal.
CONCLUSION
Crispy Chicken Katsu is more than just a fried chicken dish; it’s an experience of texture and flavor that delights the senses. Its crispy exterior giving way to tender, juicy chicken makes every bite incredibly satisfying. This recipe empowers you to easily recreate this Japanese comfort food classic in your own kitchen.
From the simple act of pounding the chicken to the rewarding sizzle in the hot oil, each step in making Chicken Katsu is part of a culinary journey. The detailed instructions and helpful tips provided ensure that even beginner cooks can achieve restaurant-quality results. Imagine the joy of serving perfectly crispy, golden-brown katsu, a dish that’s sure to impress family and friends alike.
Whether served with steamed rice, a flavorful dipping sauce, or as part of a larger Japanese meal, Crispy Chicken Katsu is a versatile and crowd-pleasing dish. It’s perfect for a weeknight dinner or a special weekend feast. Embrace the simplicity and deliciousness of this recipe and bring the joy of authentic Japanese cuisine to your table. Enjoy the journey of creating and savoring every crispy bite of homemade Chicken Katsu.
