Introduction:
Why You’ll Love This Recipe:
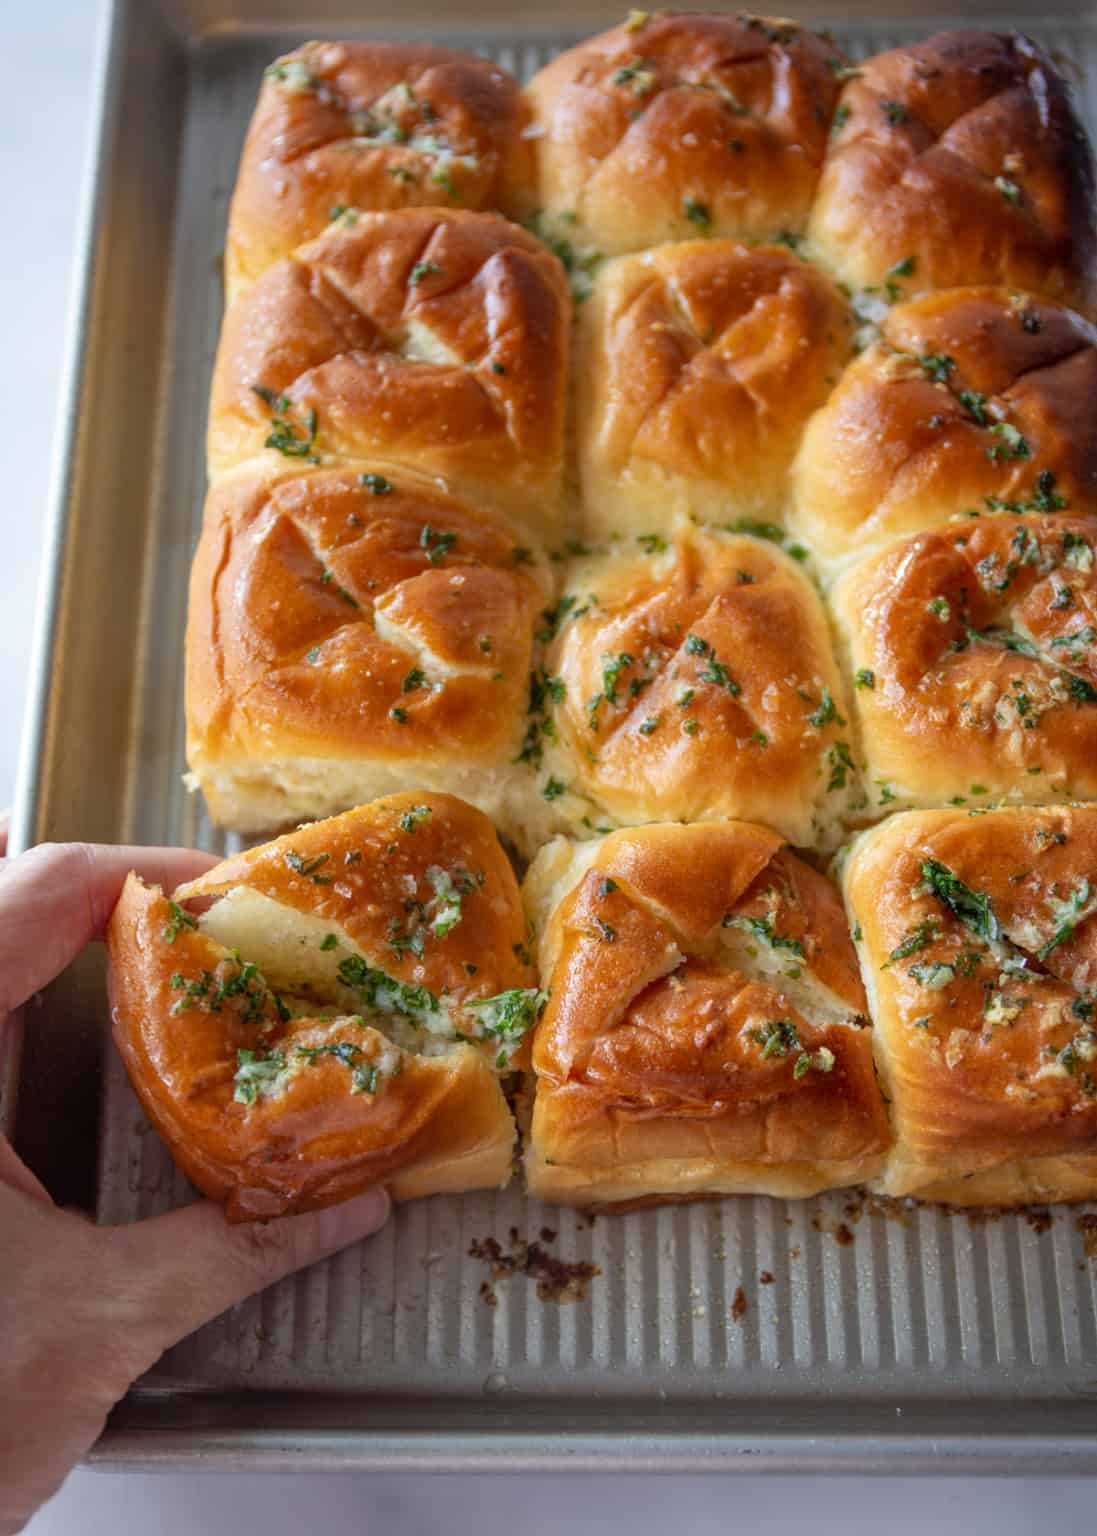
Elevate your garlic bread game with this incredibly easy and flavorful Hawaiian Roll Garlic Bread recipe! This recipe takes the soft, slightly sweet goodness of Hawaiian rolls and transforms them into irresistible, buttery, garlic-infused delights. Imagine warm, pillowy Hawaiian rolls bursting with garlicky butter, lightly toasted to perfection, and ready to complement any meal or be devoured on their own. It’s a quick and simple way to create a crowd-pleasing appetizer, side dish, or snack that everyone will love.
This recipe is not only incredibly delicious but also exceptionally fast and straightforward to make. With just a few pantry staples and minimal effort, you can whip up a batch of these craveable garlic bread rolls in minutes. It’s perfect for busy weeknights, last-minute gatherings, or when you simply want a comforting and flavorful bread to enjoy. The combination of sweet Hawaiian rolls and savory garlic butter is unexpectedly delightful.
Get ready to experience garlic bread bliss with this easy and flavorful recipe. This Hawaiian Roll Garlic Bread is more than just a side dish; it’s a warm, comforting, and utterly addictive experience that will have everyone reaching for seconds (and thirds!). The soft texture of the Hawaiian rolls combined with the rich, garlicky butter creates a truly unforgettable treat.
INGREDIENTS YOU’LL NEED:
To create this irresistible Hawaiian Roll Garlic Bread, you will need just a handful of simple ingredients that work together to achieve its signature buttery, garlicky, and slightly sweet flavor. Each component plays a vital role in the final dish. Let’s gather the essentials to bring this recipe to life in your kitchen.
- Hawaiian Sweet Rolls: A package of Hawaiian sweet rolls is the star of this recipe. Their signature soft texture and subtle sweetness provide the perfect base for garlic bread. Brands like King’s Hawaiian or similar work wonderfully.
- Unsalted Butter: Butter forms the base of the flavorful garlic spread, adding richness and that classic garlic bread taste. Unsalted butter allows you to control the salt level, especially since some brands of Hawaiian rolls might already contain a touch of salt.
- Garlic: Fresh garlic is crucial for the authentic garlic bread flavor. Minced garlic infuses the butter with its pungent and aromatic notes. Using fresh garlic provides a much more vibrant flavor compared to garlic powder.
- Fresh Parsley (Optional): Chopped fresh parsley adds a pop of freshness, herbaceous flavor, and a touch of color to the garlic butter. While optional, it enhances the visual appeal and flavor complexity.
- Grated Parmesan Cheese (Optional): Grated Parmesan cheese adds a salty, nutty, and savory dimension to the garlic butter. While optional, it elevates the garlic bread with an extra layer of flavor and a slightly cheesy note.
- Garlic Powder (Optional, for extra garlic boost): Garlic powder can be added in addition to fresh garlic to intensify the garlic flavor, if desired. Use it sparingly as it’s more concentrated than fresh garlic.
HOW TO MAKE “Hawaiian Roll Garlic Bread”:
Creating this delectable Hawaiian Roll Garlic Bread is incredibly quick and easy, making it a perfect choice for a speedy side dish or appetizer. The beauty of this recipe lies in its straightforward method, transforming store-bought rolls into a flavor-packed treat with minimal effort. Let’s outline the basic steps to guide you through the creation of this bread delight.
First, you will prepare the garlic butter. This involves melting butter and then mixing it with minced garlic, parsley (optional), Parmesan cheese (optional), and garlic powder (optional). Creating the garlic butter separately ensures all the flavors are well combined and infused before being applied to the rolls.
Next, you will prepare the Hawaiian rolls. You can either keep them connected as a sheet or separate them slightly, depending on your preference for individual rolls or a pull-apart style. Preparing the rolls for the garlic butter application is a simple step that allows for even flavor distribution.
Then, you will generously brush or spread the garlic butter all over the tops and sides of the Hawaiian rolls. Coating generously ensures maximum flavor and moistness in every bite.
Finally, you will bake or broil the garlic butter-coated Hawaiian rolls until they are heated through and lightly golden brown. Baking or broiling until golden brown creates a slightly crisp exterior while keeping the inside soft and pillowy.
After baking or broiling, serve immediately while warm and fragrant. Serving warm highlights the buttery, garlicky flavors and the soft, inviting texture of the Hawaiian rolls.
STEP-BY-STEP INSTRUCTIONS:
Let’s delve into the detailed step-by-step instructions for crafting this delightful Hawaiian Roll Garlic Bread. Following these steps precisely will guarantee your garlic bread is perfectly buttery, garlicky, flavorful, and truly lives up to its “quick and easy” promise. Prepare to embark on this simple and rewarding culinary adventure!
Step 1: Prepare the Garlic Butter
In a small, microwave-safe bowl or saucepan, melt the unsalted butter. You can melt butter in the microwave in short intervals (about 30 seconds at a time) or melt it gently in a saucepan over low heat. Melting the butter first creates the base for the flavorful garlic spread.
Add the minced garlic to the melted butter. If using, also add chopped fresh parsley, grated Parmesan cheese, and garlic powder.
Stir to combine all ingredients well, ensuring the garlic and other additions are evenly distributed in the melted butter. Stirring well infuses the butter with the garlic and herb flavors.
Let the garlic butter mixture sit for a few minutes to allow the flavors to meld. This short steeping time intensifies the garlic flavor in the butter.
Step 2: Prepare the Hawaiian Rolls
Preheat oven to 350°F (175°C) or prepare your broiler (if using broiler method). Preheating the oven or broiler ensures even and quick cooking of the garlic bread.
You can leave the Hawaiian rolls connected in a sheet for a pull-apart garlic bread, or gently separate them slightly for individual rolls. The choice depends on your serving preference.
Place the Hawaiian rolls on a baking sheet lined with parchment paper or foil. Lining the baking sheet makes cleanup easier.
Step 3: Apply Garlic Butter
Using a pastry brush or spoon, generously brush or spread the garlic butter all over the tops and sides of the Hawaiian rolls. Ensure each roll is well coated with the garlic butter mixture for maximum flavor. Don’t be shy with the garlic butter!
Step 4: Bake or Broil
For Baking: Bake in the preheated oven at 350°F (175°C) for 8-12 minutes, or until heated through and lightly golden brown on top. Baking at a moderate temperature ensures the rolls heat through without burning and become lightly toasted.
For Broiling (quicker option): Broil on low setting for 1-3 minutes, watching very closely, until the tops are lightly golden brown and bubbly. Broiling is faster but requires very close monitoring to prevent burning. Broil just until lightly toasted and golden; the rolls are already cooked through and mainly need to be warmed and have the topping set.
Step 5: Serve Immediately
Once baked or broiled to golden perfection, remove the Hawaiian Roll Garlic Bread from the oven or broiler.
Serve immediately while warm and fragrant. They are best enjoyed fresh out of the oven when the garlic butter is melted and the rolls are soft and pillowy.
Garnish with extra fresh parsley or Parmesan cheese (optional, for added visual appeal). Enjoy!
USEFUL TIPS:
To ensure your Hawaiian Roll Garlic Bread is a guaranteed success, consider these useful tips and tricks. These insights will help you optimize flavor, texture, and ease of preparation, ensuring a side dish that’s worthy of becoming a regular on your table. Let’s explore some secrets to garlic bread perfection.
Don’t burn the garlic butter. When melting the butter and adding garlic, heat gently and avoid browning or burning the garlic. Burnt garlic will taste bitter. Sauté it briefly until just fragrant, or simply infuse it in the melted butter without prolonged cooking.
Use softened butter for easier mixing of the garlic butter spread. Softened butter incorporates more smoothly with the garlic and other ingredients for a more uniform spread.
Generously coat the rolls with garlic butter for maximum flavor and moisture. Don’t skimp on the garlic butter. It’s the key to the deliciousness of this recipe. Ensure every roll is well coated, especially on top and around the sides.
Watch closely when broiling! Broiling is very quick and can easily burn the garlic bread. Stay right by the broiler and watch constantly, broiling for only 1-3 minutes or until lightly golden.
For extra flavor, let the garlic butter sit for at least 5-10 minutes after making it before applying to the rolls. This steeping time allows the garlic flavor to infuse more deeply into the butter.
For a cheesy garlic bread, use a generous amount of Parmesan cheese in the garlic butter and consider adding a sprinkle of shredded mozzarella or provolone on top before baking or broiling for extra meltiness.
DETAILS:
Let’s explore the detailed specifics of this Hawaiian Roll Garlic Bread recipe, providing you with essential information for planning and preparation. Understanding these details will help you streamline the cooking process and ensure success every time you create this delightful side dish. Here are the key specifics you need to know.
Prep Time: 10 minutes (This includes garlic butter prep and roll prep)
Cook Time: 8-12 minutes (Baking time) or 1-3 minutes (Broiling time)
Total Time: Approximately 18-22 minutes (Baking) or 11-13 minutes (Broiling) (Very quick and easy side dish)
Yield: Varies depending on package size of Hawaiian rolls, typically 12 rolls
Category: Side Dish, Appetizer, Bread (Quick and easy bread side dish or appetizer)
Method: Baking or Broiling (Versatile cooking methods, baking is more forgiving, broiling is faster)
Cuisine: American-Inspired (American side dish with Hawaiian roll base and garlic bread flavors)
Diet: Vegetarian (Naturally vegetarian and can be easily adapted to be vegan – see Notes section.)
NOTES:
Here are some important notes and considerations to keep in mind as you prepare your Hawaiian Roll Garlic Bread. These insights will help you customize the recipe to your preferences and ensure the best possible outcome. Let’s explore these key notes.
For a vegan version, substitute the butter with a plant-based butter alternative that is suitable for melting and cooking. Ensure the plant-based butter contains a similar fat content to dairy butter for the best results. Omit Parmesan cheese or use a vegan Parmesan alternative.
For a richer garlic flavor, you can roast the garlic cloves before mincing and adding them to the garlic butter. Roasted garlic has a milder, sweeter, and more mellow garlic flavor compared to raw garlic.
To add Italian herb flavor, you can add a pinch of dried Italian seasoning to the garlic butter along with or instead of parsley. Italian seasoning can add a more complex herb profile.
For a spicy garlic bread, add a pinch of red pepper flakes to the garlic butter for a subtle kick.
Make-Ahead Tip: You can prepare the garlic butter ahead of time and store it in the refrigerator for up to 3 days. Reheat gently in the microwave or saucepan until melted before using. You can also assemble the garlic bread (rolls coated with garlic butter) ahead of time and keep them covered at room temperature for up to 2 hours before baking or broiling.
FREQUENTLY ASKED QUESTIONS:
Let’s address some frequently asked questions about Hawaiian Roll Garlic Bread to provide clarity and ensure your cooking experience is seamless and enjoyable. These answers cover common inquiries and offer helpful solutions. Let’s dive into these FAQs.
Q: Can I use garlic powder instead of fresh garlic?
A: While fresh garlic is highly recommended for the best flavor, you can use garlic powder in a pinch. Use about ½ – 1 teaspoon of garlic powder for this recipe, or to taste. However, fresh garlic provides a much more pungent and nuanced garlic flavor. For the best result, use fresh garlic.
Q: Can I use salted butter instead of unsalted butter?
A: Yes, you can use salted butter. If using salted butter, you may want to omit or reduce any additional salt in the recipe or when seasoning, especially if your Hawaiian rolls are already slightly salty. Taste the garlic butter before applying to the rolls and adjust if needed.
Q: Can I add other cheeses besides Parmesan?
A: Yes, you can customize the cheese blend. Shredded mozzarella, provolone, Monterey Jack, or a blend of Italian cheeses would all be delicious additions or substitutions for Parmesan. Consider cheeses that melt well and complement the garlic and butter flavors. You can sprinkle shredded cheese on top before baking or broiling for a meltier, cheesier garlic bread.
Q: How do I prevent the garlic bread from getting soggy?
A: To prevent soggy garlic bread:
* Don’t over-butter the rolls excessively. While generous garlic butter is key, avoid soaking the rolls to the point of becoming soggy.
* Bake or broil at a sufficient temperature and for the recommended time. Baking or broiling helps to toast the exterior and prevent sogginess.
* Serve immediately after baking or broiling. Garlic bread is best enjoyed fresh and warm, as it can soften slightly as it cools.
Q: Can I grill Hawaiian Roll Garlic Bread?
A: Yes, you can grill Hawaiian Roll Garlic Bread. Prepare the garlic butter and coat the rolls as directed. Wrap the rolls in foil and grill over medium heat for about 10-15 minutes, or until heated through and lightly toasted. You can also grill them directly on a lower heat grill for a few minutes per side, watching carefully to prevent burning.
Q: What are good serving suggestions for Hawaiian Roll Garlic Bread?
A: Hawaiian Roll Garlic Bread is incredibly versatile! It’s a perfect side dish for:
* Pasta dishes (spaghetti, lasagna, baked ziti, etc.)
* Soups and stews (tomato soup, minestrone, chili, etc.)
* Salads (Caesar salad, Italian salad, etc.)
* Grilled meats and vegetables
* As an appetizer on its own or with a dip (marinara sauce, cheese dip, etc.)
* Even alongside breakfast dishes like scrambled eggs or omelets for a savory touch.
STORAGE INSTRUCTIONS:
Proper storage is essential to maintain the delicious flavor and texture of your Hawaiian Roll Garlic Bread. Following these storage instructions will ensure your leftovers remain enjoyable for a short period. Let’s explore the best practices for storing this garlic bread delight.
For the best texture, enjoy fresh on the day it is made. Garlic bread is best eaten fresh, especially for its slightly crisp exterior and soft interior.
If storing leftovers, let the garlic bread cool completely before storing it. Cooling to room temperature before storing helps prevent condensation inside the storage container, which can make the bread softer.
Store leftover Hawaiian Roll Garlic Bread in airtight containers at room temperature for up to 1-2 days. Airtight containers are crucial to prevent moisture loss and maintain some degree of freshness.
Reheating is recommended to restore some of the warmth and texture. Reheat gently in a preheated oven at 300°F (150°C) for 5-10 minutes, or until heated through. You can also microwave individual rolls for quicker reheating, but the texture may be slightly less optimal compared to oven reheating. Oven reheating will help to crisp the exterior slightly again.
Freezing Hawaiian Roll Garlic Bread is not recommended for optimal texture. Freezing and thawing can significantly alter the texture of garlic bread, making it softer or potentially soggy. It is best enjoyed fresh or within a day or two of making.
RELATED RECIPES
If you thoroughly enjoyed the quick, easy, and garlicky goodness of this Hawaiian Roll Garlic Bread, you are sure to delight in these other related garlic bread and bread roll recipes that offer similar comforting flavors and textures. These recipes provide a variety of options to explore for your next bread side dish or appetizer. Prepare to discover your new favorite bread!
Classic Garlic Bread (Baguette or Italian Loaf): Explore the foundational garlic bread recipe using a baguette or Italian loaf for a more traditional garlic bread experience with a different bread texture. Classic Garlic Bread offers a benchmark comparison and a different textural base, focusing on a crisp baguette or Italian loaf.
Cheesy Garlic Bread (with Mozzarella or Provolone): Indulge in extra cheesy garlic bread by adding melted mozzarella, provolone, or other cheeses on top of the garlic buttered bread for an even richer and cheesier side dish. Cheesy Garlic Bread expands on the garlic bread concept by adding melted cheese for extra richness and indulgence.
Garlic Knots (Soft and Chewy Bread Knots): Try making soft and chewy garlic knots, twisted bread rolls brushed with garlic butter, for a fun and flavorful bread appetizer. Garlic Knots offer a different shape and texture – soft, chewy knots – while maintaining the core garlic bread flavor profile.
Homemade Dinner Rolls (Soft and Fluffy): If you want to make bread rolls from scratch, try a recipe for soft and fluffy homemade dinner rolls, which you can then brush with garlic butter for homemade garlic rolls. Homemade Dinner Rolls offer a completely from-scratch bread roll experience, allowing for full control over texture and ingredients, and can be adapted to be garlic rolls.
These related recipes, while distinct in their specific forms and flavors, all share that comforting, buttery, garlicky, and incredibly satisfying quality that makes Hawaiian Roll Garlic Bread so irresistible. Explore these bread and garlic bread delights to expand your culinary repertoire and discover new family favorites that are sure to please.
CONCLUSION
Hawaiian Roll Garlic Bread is more than just a side dish; it’s a quick and easy flavor booster, a guaranteed crowd-pleaser, and a celebration of simple ingredients transformed into something utterly delicious. This recipe effortlessly combines sweet Hawaiian rolls and savory garlic butter to create a dish that is both familiar and uniquely delightful. From the soft, pillowy rolls and rich garlicky aroma to the golden brown perfection after baking or broiling, every element works in harmony to deliver a truly unforgettable garlic bread experience.
The beauty of this recipe lies in its simplicity and speed. Whether you’re a seasoned cook or a beginner in the kitchen, you can easily master this recipe and impress your family and friends with this flavorful side dish made right in your own oven (or broiler!). The straightforward preparation and minimal cooking time make it a go-to recipe for busy weeknights, last-minute gatherings, potlucks, or any time you crave a truly satisfying and comforting bread.
From casual weeknight dinners to special occasions and potluck contributions, Hawaiian Roll Garlic Bread is versatile enough for any occasion. Its universally loved flavors, soft texture, and easy-to-serve format make it a memorable dish that is sure to spark smiles and delight taste buds of all ages. It’s a simple side that steals the show!
So, gather your Hawaiian rolls, butter, garlic, and preheat your oven (or broiler!), and prepare to create some garlic bread magic. Hawaiian Roll Garlic Bread is ready to transform your kitchen into a haven of warm aromas, buttery delights, and pure comfort food bliss. Indulge in the softness, the garlicky goodness, the sweet and savory combination, and the sheer satisfaction of this unforgettable side dish – your taste buds (and everyone you share it with!) will thank you for this taste of homemade comfort, perfectly captured in a quick and easy recipe!
