Introduction:
Lemon Meltaways are aptly named – these delicate cookies truly melt in your mouth. Bursting with bright, fresh lemon flavor, they are a delightful treat perfect for any occasion, from afternoon tea to a spring brunch or a simple sweet craving. Their tender, almost crumbly texture and tangy lemon glaze make them utterly irresistible.
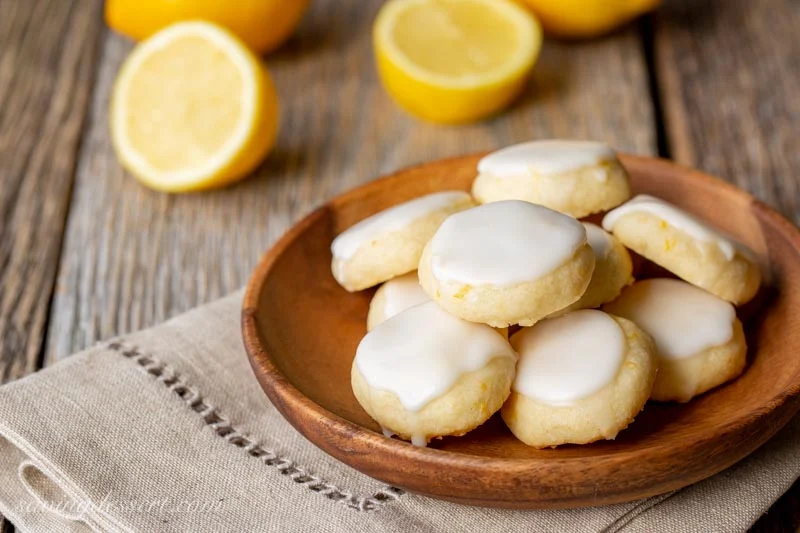
Imagine a cookie that’s light as air, subtly sweet, and infused with the zesty essence of lemon. The cookie itself is delicate and buttery, dissolving on your tongue with each bite. The luscious lemon glaze adds a final flourish of tartness and sweetness, enhancing the lemon flavor and creating a truly “meltaway” experience.
Whether you are an experienced baker or just starting out, Lemon Meltaways are an excellent recipe to try. They are surprisingly easy to make, require simple ingredients, and deliver a sophisticated and delicious result that’s sure to impress. Get ready to enjoy the bright, refreshing taste of homemade Lemon Meltaways.
Why You’ll Love This Recipe:
This recipe for Lemon Meltaways is destined to become a favorite for many compelling reasons. Firstly, the intense lemon flavor is simply irresistible. The combination of lemon zest and juice in both the cookie and the glaze creates a bright, tangy, and refreshing taste that is perfect for lemon lovers. It’s a burst of sunshine in every bite.
Secondly, the melt-in-your-mouth texture is truly unique and delightful. These cookies are incredibly tender and delicate, almost dissolving as you eat them. This delicate texture is what makes them so special and sets them apart from other cookies. It’s a texture that is both luxurious and comforting.
Finally, this recipe is surprisingly easy to make, despite its sophisticated result. With straightforward steps and readily available ingredients, you can have a batch of bakery-quality Lemon Meltaways ready in under an hour. The ease of preparation makes them perfect for both everyday baking and special occasions, accessible for bakers of all skill levels.
INGREDIENTS YOU’LL NEED:
To create these delicate and flavorful Lemon Meltaways, you will need a selection of pantry staples and fresh lemon to provide the signature citrus burst. The base of the cookies is butter. Unsalted butter is crucial for controlling the salt level in the cookies and allowing the pure butter flavor to shine through. Good quality butter contributes to the rich flavor and tender texture.
Powdered sugar (also known as confectioners’ sugar) is used in both the cookies and the glaze, providing sweetness and a delicate texture. Powdered sugar is finer than granulated sugar and contributes to the “meltaway” texture in the cookies and a smooth glaze. All-purpose flour forms the structure of the cookies. Use unbleached all-purpose flour for best results.
Lemon zest and lemon juice are the key flavor components, providing the signature bright and tangy lemon taste. Fresh lemon zest, the finely grated outer layer of the lemon peel, contains concentrated lemon oils and provides intense lemon flavor without bitterness. Fresh lemon juice adds tartness and acidity, balancing the sweetness of the cookies and glaze. Using both zest and juice ensures a well-rounded lemon flavor.
Vanilla extract enhances the sweetness and adds a touch of warmth and complexity to the flavor profile. Pure vanilla extract is recommended for the best flavor. Salt is essential for balancing the sweetness and enhancing all the flavors in both the cookies and the glaze. Use kosher salt or sea salt for the best flavor.
For the lemon glaze, in addition to powdered sugar and lemon juice, you will need a liquid to adjust the consistency. Milk or water can be used. Milk will create a slightly richer glaze, while water will result in a slightly thinner and crisper glaze. Choose based on your preferred glaze texture.
Optional additions for enhancing the cookies and glaze include lemon extract for an even more intense lemon flavor, especially if your lemons are less fragrant. Lemon extract intensifies the lemon flavor but should be used sparingly as it can be potent. Yellow food coloring (optional) can be added to the glaze for a more vibrant lemon-yellow appearance, enhancing visual appeal, particularly for presentation purposes.
HOW TO MAKE “Lemon Meltaways”:

Making Lemon Meltaways is a straightforward and satisfying baking process. The recipe primarily utilizes creaming, mixing, and baking for the cookies, followed by a simple mixing method for the glaze. The creaming method incorporates air into the butter and sugar, creating a light and tender cookie. The glaze is a quick mix of powdered sugar and lemon juice, providing the final lemony touch.
The recipe is structured into clear, easy-to-follow steps. It begins with making the cookie dough by creaming butter and sugar, then incorporating the remaining cookie ingredients. The dough is chilled, rolled, and cut into desired shapes before baking until just lightly golden. While the cookies cool, the lemon glaze is prepared, and then the cooled cookies are dipped or drizzled with the glaze.
By carefully following the step-by-step instructions, even novice bakers can easily achieve delicious and beautiful Lemon Meltaways at home. The simplicity of the method belies the incredible flavor and delicate texture of the finished cookies. Get ready to enjoy these delightful melt-in-your-mouth lemon treats!
STEP-BY-STEP INSTRUCTIONS:
Step 1: Make the Cookie Dough. In a large bowl, cream together the softened unsalted butter and powdered sugar until light and fluffy. Creaming butter and sugar incorporates air, which is essential for creating tender cookies. Use an electric mixer (stand mixer or hand mixer) for best results. Cream until the mixture is pale and noticeably lighter in texture.
Beat in the lemon zest, lemon juice, vanilla extract, and salt until well combined. Adding wet ingredients after creaming ensures even distribution. Beat until all ingredients are fully incorporated and the mixture is smooth.
Gradually add the all-purpose flour, mixing on low speed until just combined. Add flour gradually to prevent overmixing, which can lead to tough cookies. Mix just until the flour is incorporated and no streaks of flour remain. Do not overmix the dough. The dough will be soft and slightly sticky, this is normal.
Step 2: Chill the Dough. Wrap the cookie dough in plastic wrap and flatten it into a disc. Flattening helps the dough chill more evenly. Chilling is crucial for making the dough easier to handle and roll out.
Refrigerate the dough for at least 1 hour, or preferably 2-3 hours, or even overnight. Chilling allows the butter to firm up, preventing the cookies from spreading too much during baking. Well-chilled dough is easier to roll out and cut into shapes.
Step 3: Roll and Cut Out Cookies. Preheat your oven to 350°F (175°C). Line baking sheets with parchment paper. Preheating the oven ensures it reaches the correct temperature for baking. Parchment paper prevents sticking and makes for easy cleanup.
Lightly flour a clean work surface and a rolling pin. Flouring prevents the dough from sticking to the surface and rolling pin. Remove the chilled dough from the refrigerator. If the dough is very firm, let it sit at room temperature for a few minutes to soften slightly before rolling. Slight softening makes it easier to roll out cold dough.
Roll out the chilled dough to about 1/4-inch thickness. Roll evenly for uniformly thick cookies. Cut out cookies using cookie cutters of your desired shapes. Use cookie cutters to create consistent and visually appealing shapes. Classic shapes like circles, squares, or lemon shapes work well.
Place the cut-out cookies onto the prepared baking sheets, leaving about 1-inch space between cookies. Spacing allows for air circulation and even baking. Reroll any dough scraps and cut out more cookies until all dough is used. Rerolling scraps minimizes dough waste.
Step 4: Bake the Cookies. Bake in the preheated oven for 8-10 minutes, or until the edges are just lightly golden and the cookies are set but still pale. Baking time is short as these are delicate cookies and should remain pale and tender. Overbaking will make them dry and less tender. Cookies should be just set and barely starting to color around the edges.
Remove the baking sheets from the oven and let the cookies cool on the baking sheets for a few minutes before transferring them to a wire rack to cool completely. Cooling slightly on baking sheets allows cookies to firm up a bit before transferring, preventing breakage. Cool completely on a wire rack to stop the baking process and allow for proper glazing.
Step 5: Make the Lemon Glaze. While the cookies are cooling, prepare the lemon glaze. In a small bowl, whisk together the powdered sugar and lemon juice until smooth. Whisk until no lumps remain and the glaze is smooth and pourable. Add milk or water, 1 teaspoon at a time, to reach your desired glaze consistency. Adjust liquid gradually to achieve a glaze that is thick enough to coat the cookies but still pourable. If desired, stir in lemon extract for extra lemon flavor and yellow food coloring (if using). Lemon extract enhances lemon intensity. Food coloring adds visual appeal.
Step 6: Glaze the Cooled Cookies. Once the cookies are completely cooled, dip the tops of the cookies into the lemon glaze, or drizzle glaze over the cookies using a spoon or piping bag. Ensure cookies are fully cooled before glazing to prevent glaze from melting off. Dipping creates a thicker, more uniform glaze coating. Drizzling offers a more delicate and decorative glaze application.
Let the glaze set completely before serving or storing the cookies. Allowing glaze to set firms it up and prevents stickiness. Setting time may vary depending on glaze thickness and humidity.
Step 7: Serve and Store. Once the lemon glaze is set, the Lemon Meltaways are ready to serve and enjoy. Serve these delicate cookies with tea, coffee, or as a sweet treat anytime.
Store leftover Lemon Meltaways in an airtight container at room temperature. Proper storage in an airtight container maintains freshness and prevents cookies from drying out or becoming stale. Room temperature storage is suitable for these cookies.
USEFUL TIPS:
For the most intense lemon flavor, use Meyer lemons if available. Meyer lemons are sweeter and less acidic than regular lemons, with a more floral aroma. Meyer lemons offer a unique and fragrant lemon flavor. Regular lemons work well too, but Meyer lemons can elevate the lemon flavor profile.
To get even more lemon zest flavor, try zesting the lemons directly into the sugar1 and rubbing the zest and sugar together with your fingers before creaming with the butter. Rubbing zest with sugar releases lemon oils and intensifies zest flavor. This technique enhances the lemon flavor in the cookies themselves.
If you want a tangier glaze, add a little more lemon juice to the glaze. Adjusting lemon juice in glaze allows for customization of tartness. Taste and adjust glaze to reach your preferred level of tanginess.
For a slightly different texture, try using a mix of butter and vegetable shortening. Shortening can contribute to a slightly softer texture and prevent cookies from spreading too much, but butter provides superior flavor. Experiment with butter-shortening ratios to find your preferred texture and flavor balance.
If your dough is too soft to roll out easily after chilling, you can chill it for a bit longer or work in small batches, keeping the rest of the dough chilled while you roll and cut out cookies. Keeping dough chilled ensures it remains manageable and easy to work with. Working in batches prevents dough from warming up too quickly.
For a more decorative look, you can sprinkle the glazed cookies with lemon zest, colored sprinkles, or edible glitter before the glaze sets. Decorations add visual appeal and festive touch. Sprinkles, zest, or glitter enhance presentation for special occasions or gifting.
DETAILS:
Prep Time: 30 minutes (including chilling time planning). The preparation time includes zesting lemons, making dough, and chilling dough. Chilling time is a significant portion of prep time and needs to be factored in. Efficient prep work before chilling streamlines the process.
Cook Time: 8-10 minutes baking. The baking time is short as these are delicate cookies and should remain pale and tender. Short baking time is key to maintaining meltaway texture. Monitor cookies closely during baking to prevent overbaking.
Total Time: 45-60 minutes (including chilling and cooling time). The total time from start to finish, including prep, chilling, baking, and cooling, is approximately 45-60 minutes. Chilling and cooling time contribute significantly to total time. Total time is manageable for a batch of homemade cookies.
Yield: Approximately 24-36 cookies (depending on size of cookie cutters). This recipe yields approximately 24-36 cookies, suitable for a family or small gathering. Yield depends on cookie cutter size; smaller cutters yield more cookies. Yield is sufficient for a treat to share or enjoy over a few days.
Category: Cookie, Dessert, Treat. Lemon Meltaways are categorized as a cookie, dessert, and treat. Their categorization highlights their primary use and dietary appropriateness. Category reflects their role as a sweet and indulgent baked good.
Method: Baking, Creaming, Rolling, Glazing. The primary methods are baking the cookies, creaming butter and sugar, rolling out dough, and glazing the baked cookies. Creaming creates tender cookies. Rolling and cutting shapes cookies. Glazing adds flavor and visual appeal. These methods combine to create the final treat.
Cuisine: American, Dessert, Tea Cookie. Lemon Meltaways are American in style and often served as dessert or tea cookies. Tea cookies are typically delicate, sweet, and flavorful, and these fit that description. Cuisine reflects the recipe’s origin and typical serving occasions.
Diet: Vegetarian. This recipe is inherently vegetarian as it contains no meat, poultry, or fish. It is suitable for individuals following a vegetarian diet. Diet category highlights suitability for vegetarian dietary preferences.
NOTES:
One note on cookie tenderness is important – do not overbake these cookies. They should be pale and just set, not browned, to maintain their delicate meltaway texture. Overbaking will result in dry and less tender cookies. Bake until edges are just barely golden and centers are set.
Another note is regarding glaze consistency. The glaze should be thick enough to coat the cookies nicely but still thin enough to drizzle or dip smoothly. Adjust the amount of liquid (lemon juice, milk or water) to achieve the desired consistency. Glaze consistency is crucial for appearance and taste; too thick glaze is clumpy, too thin is watery.
For serving suggestions, Lemon Meltaways are lovely on their own, but also pair well with: a cup of tea or coffee, fresh berries, or a scoop of vanilla ice cream. Pairing suggestions enhance serving presentation and complement cookie flavors. Consider serving with beverages or fresh fruit to balance sweetness.
If you want to make lemon bars instead of cookies with similar flavor profile, you can adapt this recipe by pressing the dough into a pan and baking it as a base for lemon bars. Lemon bar adaptation offers a different format for similar lemon flavor. Press dough into pan and bake until set, then top with a lemon bar filling recipe.
FREQUENTLY ASKED QUESTIONS:
Q: Can I use margarine or shortening instead of butter?
A: While butter is recommended for the best flavor and texture in Lemon Meltaways, you can technically use margarine or shortening as substitutes if needed. However, the flavor and texture will be slightly different. Margarine may contain more water and can affect cookie spread and texture. Shortening will result in a softer cookie but may lack the rich flavor of butter. Butter is highly recommended for authentic flavor and meltaway texture. If using substitutes, choose high-quality options for best results.
Q: Can I make these cookies gluten-free?
A: Yes, you can make Lemon Meltaways gluten-free by substituting the all-purpose flour with a gluten-free all-purpose flour blend. Ensure the gluten-free flour blend is designed as a 1:1 replacement for all-purpose flour and contains xanthan gum or a similar binder for best texture in cookies. Gluten-free flour substitutions are possible for dietary needs. Gluten-free flour blends may slightly alter texture and baking time, so monitor closely during baking.
Q: My cookie dough is too sticky to roll out, what should I do?
A: Lemon Meltaway cookie dough is naturally soft, and can become too sticky to roll out if it gets too warm. If your dough is too sticky, return it to the refrigerator to chill for a longer period, at least another 30 minutes to an hour, to firm up further. You can also try rolling the dough out between two sheets of parchment paper or wax paper instead of directly on a floured surface to minimize sticking. Chilling dough and rolling between parchment are helpful techniques for sticky dough.
Q: How long do Lemon Meltaways last?
A: Lemon Meltaways will last for up to 5-7 days when stored in an airtight container at room temperature. For optimal freshness, consume them within the first 3-4 days. Proper storage in an airtight container prevents drying out and maintains freshness. Room temperature storage is suitable for these cookies. They are best enjoyed fresh but maintain quality for about a week if stored correctly.
STORAGE INSTRUCTIONS:
To ensure your leftover Lemon Meltaways remain delicate, flavorful, and melt-in-your-mouth delicious, proper storage is essential. Allow the lemon glaze on the cookies to set completely and harden before storing. Stacking glazed cookies before the glaze sets can cause them to stick together and smudge the glaze. Ensure glaze is fully dry before storage.
Store the completely cooled and glazed Lemon Meltaways in an airtight container. Arrange the cookies in a single layer if possible to prevent them from sticking to each other and damaging the delicate glaze. If you need to layer them, place parchment paper or wax paper between layers to prevent sticking. Airtight containers are crucial for maintaining freshness, preventing drying out, and protecting the delicate cookies.
Store the airtight container of Lemon Meltaways at room temperature. Room temperature storage is recommended for these cookies to maintain their meltaway texture. Avoid storing in the refrigerator unless your kitchen is very warm and you are concerned about the glaze softening excessively, as refrigeration can sometimes dry out delicate cookies slightly. Room temperature storage is generally preferred for texture and flavor retention.
Consume stored Lemon Meltaways within 5-7 days for the best quality and flavor. While they may remain safe to eat for slightly longer, the texture and lemon flavor may degrade over time, and the “meltaway” quality is best when fresh. For optimal taste and texture, it is recommended to consume them within this timeframe. Always use your senses—sight, smell, and taste—to assess the quality of leftovers before consuming.
Reheating is not recommended for Lemon Meltaways, as they are designed to be enjoyed at room temperature to best appreciate their delicate texture and glaze. Reheating may alter the glaze and texture and is generally not necessary for these cookies. They are best served and stored at room temperature.
RELATED RECIPES
If you savored the bright lemon flavor and delicate texture of Lemon Meltaways, you will likely enjoy these other citrus-forward and melt-in-your-mouth cookie and treat variations. Consider trying Orange Meltaways, a variation that swaps lemon for orange, offering a similar delicate texture with a different citrus flavor profile. Orange meltaways provide a similar baking experience but with a warmer, sweeter orange flavor instead of lemon’s tang. They are a delicious alternative for citrus cookie lovers.
Another excellent option is Key Lime Meltaways, featuring the unique tangy-sweet flavor of key lime in a similar meltaway cookie format. Key lime meltaways offer a more tropical citrus flavor and often a slightly tangier taste than lemon meltaways. Key lime provides a distinct and flavorful citrus twist on the meltaway concept.
For a different type of melt-in-your-mouth cookie, explore Shortbread Cookies, classic buttery and tender cookies that are simple and elegant. Shortbread cookies, while not citrus-flavored, share the delicate, buttery, meltaway texture with Lemon Meltaways but offer a richer, buttery flavor profile. They are a great choice for lovers of simple and buttery cookies. These related recipes offer diverse citrus variations and flavor profiles within the meltaway cookie category, providing a range of delicious options to explore beyond Lemon Meltaways.
CONCLUSION
Lemon Meltaways are the perfect embodiment of a delicate and delightful cookie – bursting with fresh lemon flavor and boasting a truly melt-in-your-mouth texture. This recipe offers a simple and accessible path to creating these elegant treats at home, bringing a touch of sunshine and sweetness to any occasion. Whether you’re baking for a special event, a simple afternoon treat, or just to brighten your day, Lemon Meltaways are sure to become a cherished favorite.
The combination of buttery, tender cookies and a tangy-sweet lemon glaze creates a symphony of tastes and textures that is both comforting and sophisticated. Homemade Lemon Meltaways are far superior to store-bought versions, allowing you to control the quality of ingredients and enjoy the freshness of homemade baking. They are a treat that is as enjoyable to make as they are to eat, perfectly capturing the bright and cheerful spirit of lemon desserts.
So, gather your lemons, preheat your oven, and prepare to experience the simple joy of homemade Lemon Meltaways. Don’t be afraid to experiment with variations, adding your favorite citrus zest or decorations to create your own personalized version of these delightful cookies. Embrace the simplicity, savor the flavors, and enjoy the melt-in-your-mouth goodness of every bite. Happy baking, and may your Lemon Meltaways bring sunshine and sweetness to your kitchen and beyond!
